Wix is a popular software company that provides cloud-based web development services. It allows users to create both HTML5 websites as well as mobile sites. Due to some of the limitations that Wix places on embedding third party Javascript code into their websites, this makes integrating with Billsby problematic as it disables certain aspects of Billsby's features, including:
- The 'Continue' button: this would normally forward customers to a thank-you page, but will not work when you click it on a Wix website
- The 'Close' button: this would normally close the Billsby Checkout modal directly, but instead requires a secondary 'Close' button overlaid on top of it when accessed through Wix
- The responsive feature: this would normally optimize the size of the Checkout for mobile screens, but will not work when accessed through Wix, instead the Checkout will remain a fixed width
- Passing customer details into Billsby Checkout is also disabled on Wix websites
We’re currently working to improve how Billsby Checkout can be customised to make the 'Continue' and 'Close' buttons more functional. But in the meantime, if you're happy with these limitatations, it is still absolutely possible to embed Billsby Checkout into your website today. Here's how.
Identify your Billsby Checkout URL
Normally, when you embed Billsby into a website, you would use your Billsby embed code, which looks something like this:
// Header Code

<script src="https://checkoutlib.billsby.com/checkout.min.js" data-billsby-company="candybypost"></script>

// Body Link

<a href="javascript:void(0)" data-billsby-type="checkout">Subscribe</a>
// Header Code

<script src="https://checkoutlib.billsby.com/checkout.min.js" data-billsby-company="candybypost"></script>

// Body Link

<a href="javascript:void(0)" data-billsby-type="checkout" data-billsby-product="38" data-billsby-plan="41" data-billsby-cycle="61">Subscribe</a>
As you can see in the second example, at its most complex, you might have specified products, plans and cycles. However, Wix doesn’t accept our standard embed code, so the first thing you need to do is convert it into a URL. To do this, use the template below:
If you’re not specifying a product, plan or cycle that’s OK, you can just leave those parts out.
For example, using the two templates above, you would get the following URLs:
https://checkout.billsby.com/subscription?data-billsby-company=candybypost
If you click on those links, you should notice that they both open the Billsby Checkout at the right place in the checkout flow. Now let's embed them into a pop-up window for your Wix site.
Creating and setting up your subscribe button
To create and set-up your 'Subscribe' button, head to your website on Wix and enter the editing mode. Then, navigate to the page where you’d like to put a 'Subscribe' button for the Billsby Checkout.
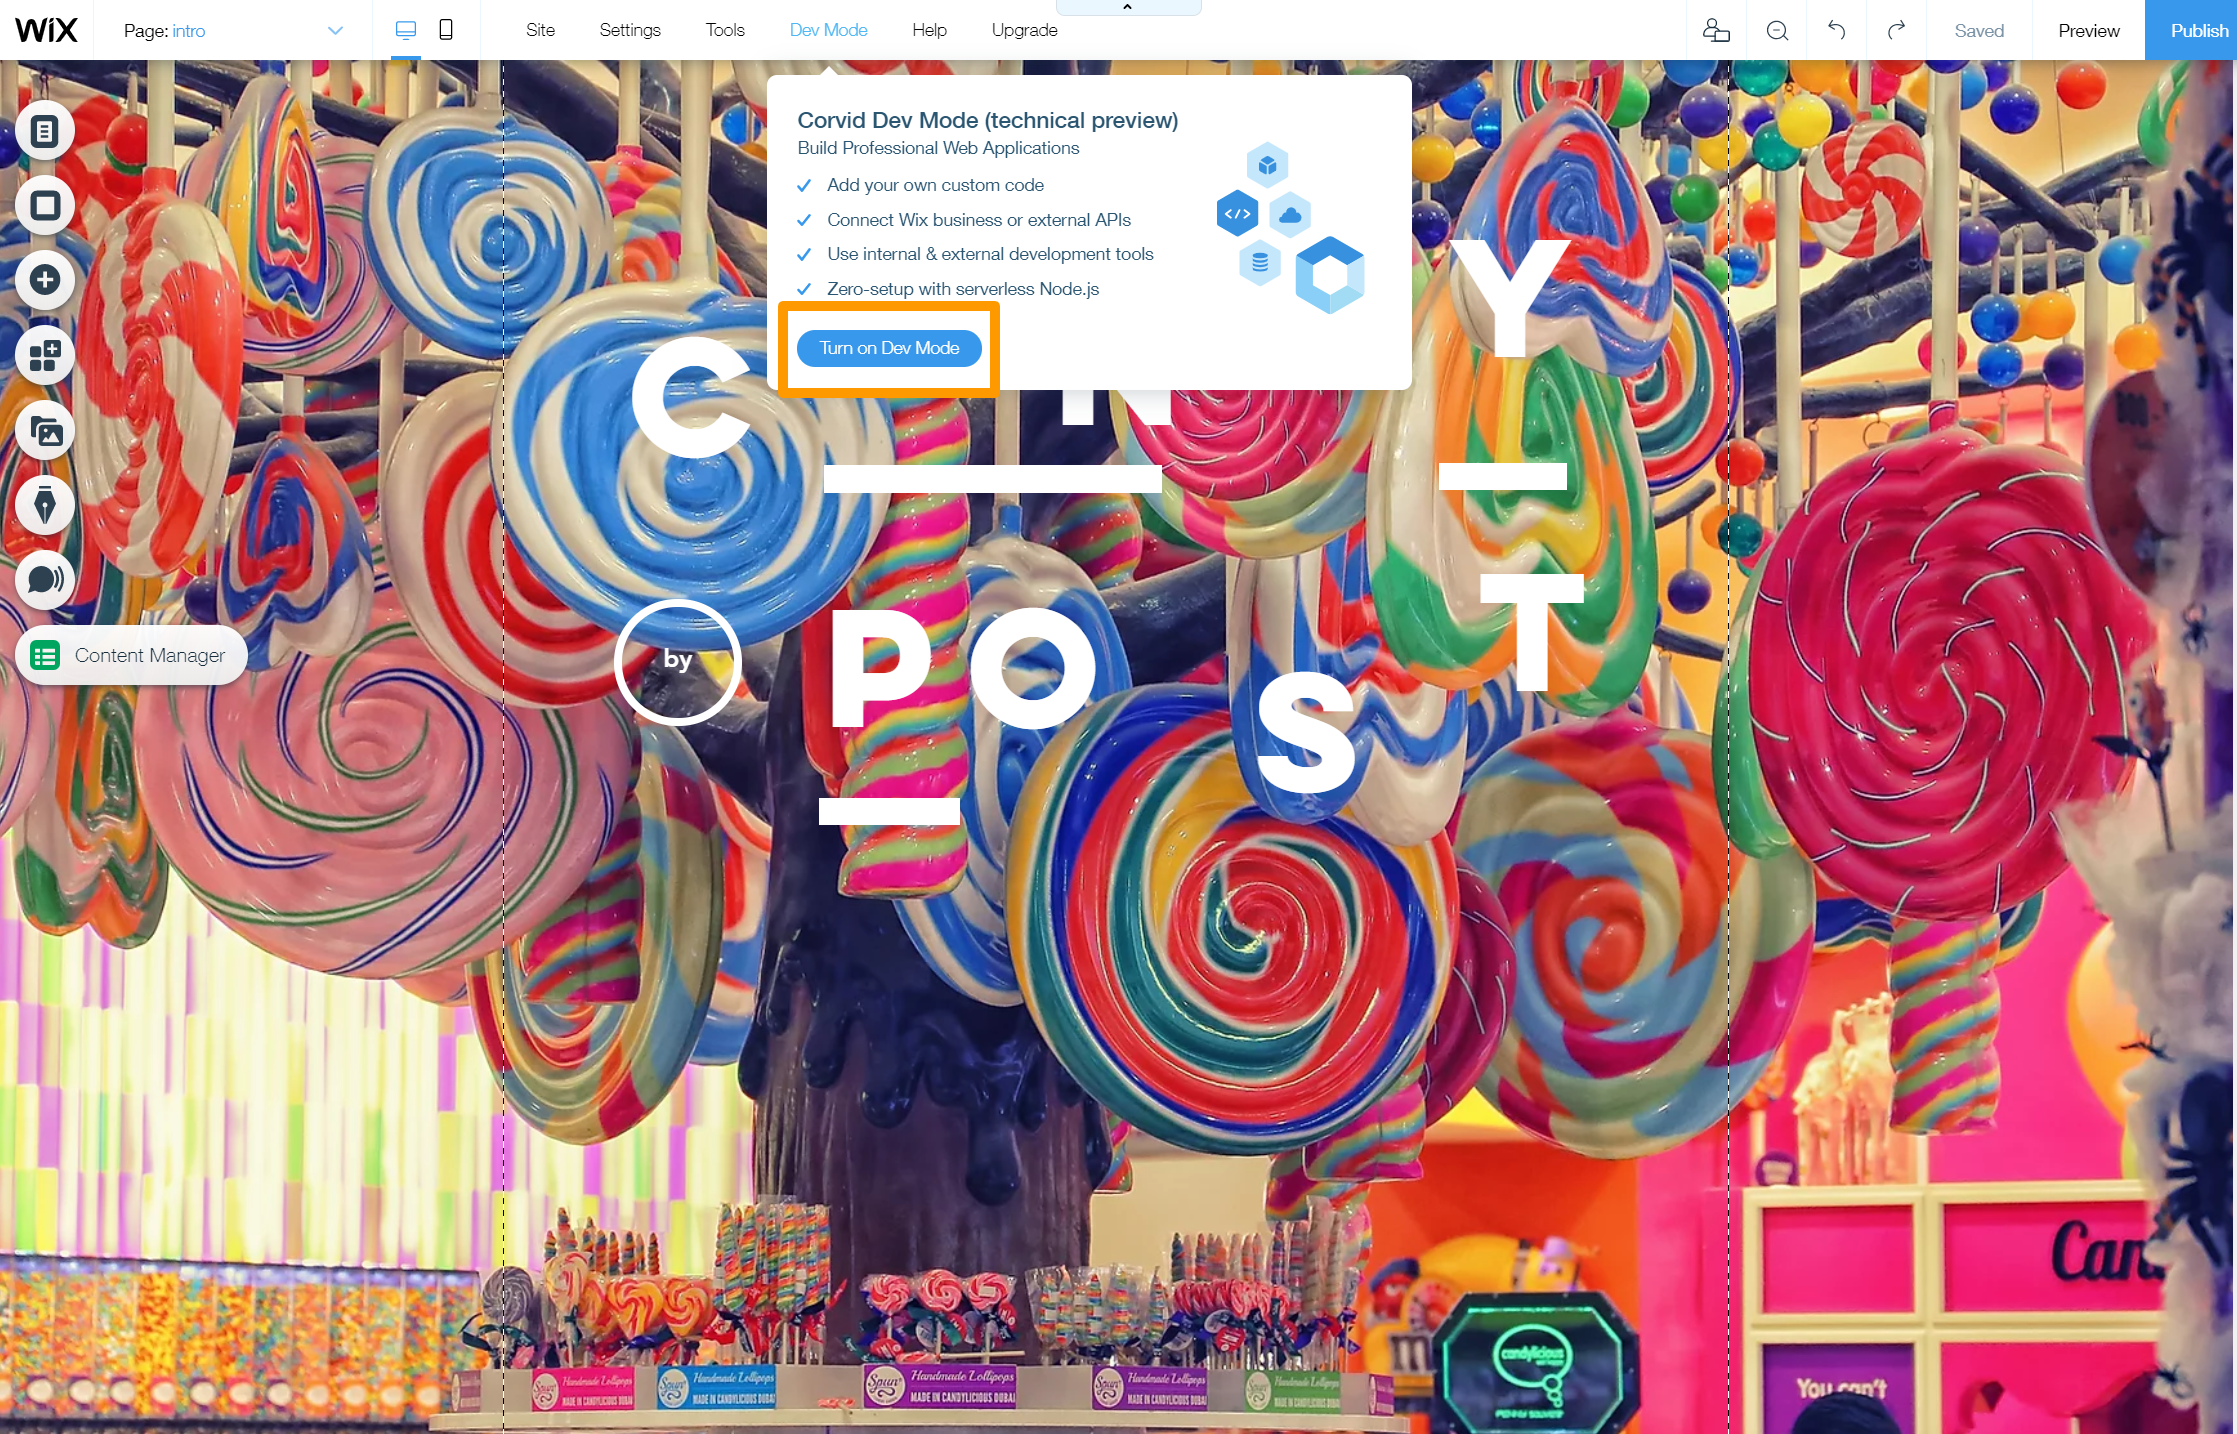
In order to complete the next step, you'll need to use Wix’s advanced editor, Corvid Dev Mode. So, to do this, select the 'Dev Mode' button in the bar at the top of the screen and click 'Turn on Dev Mode', if you haven't already.
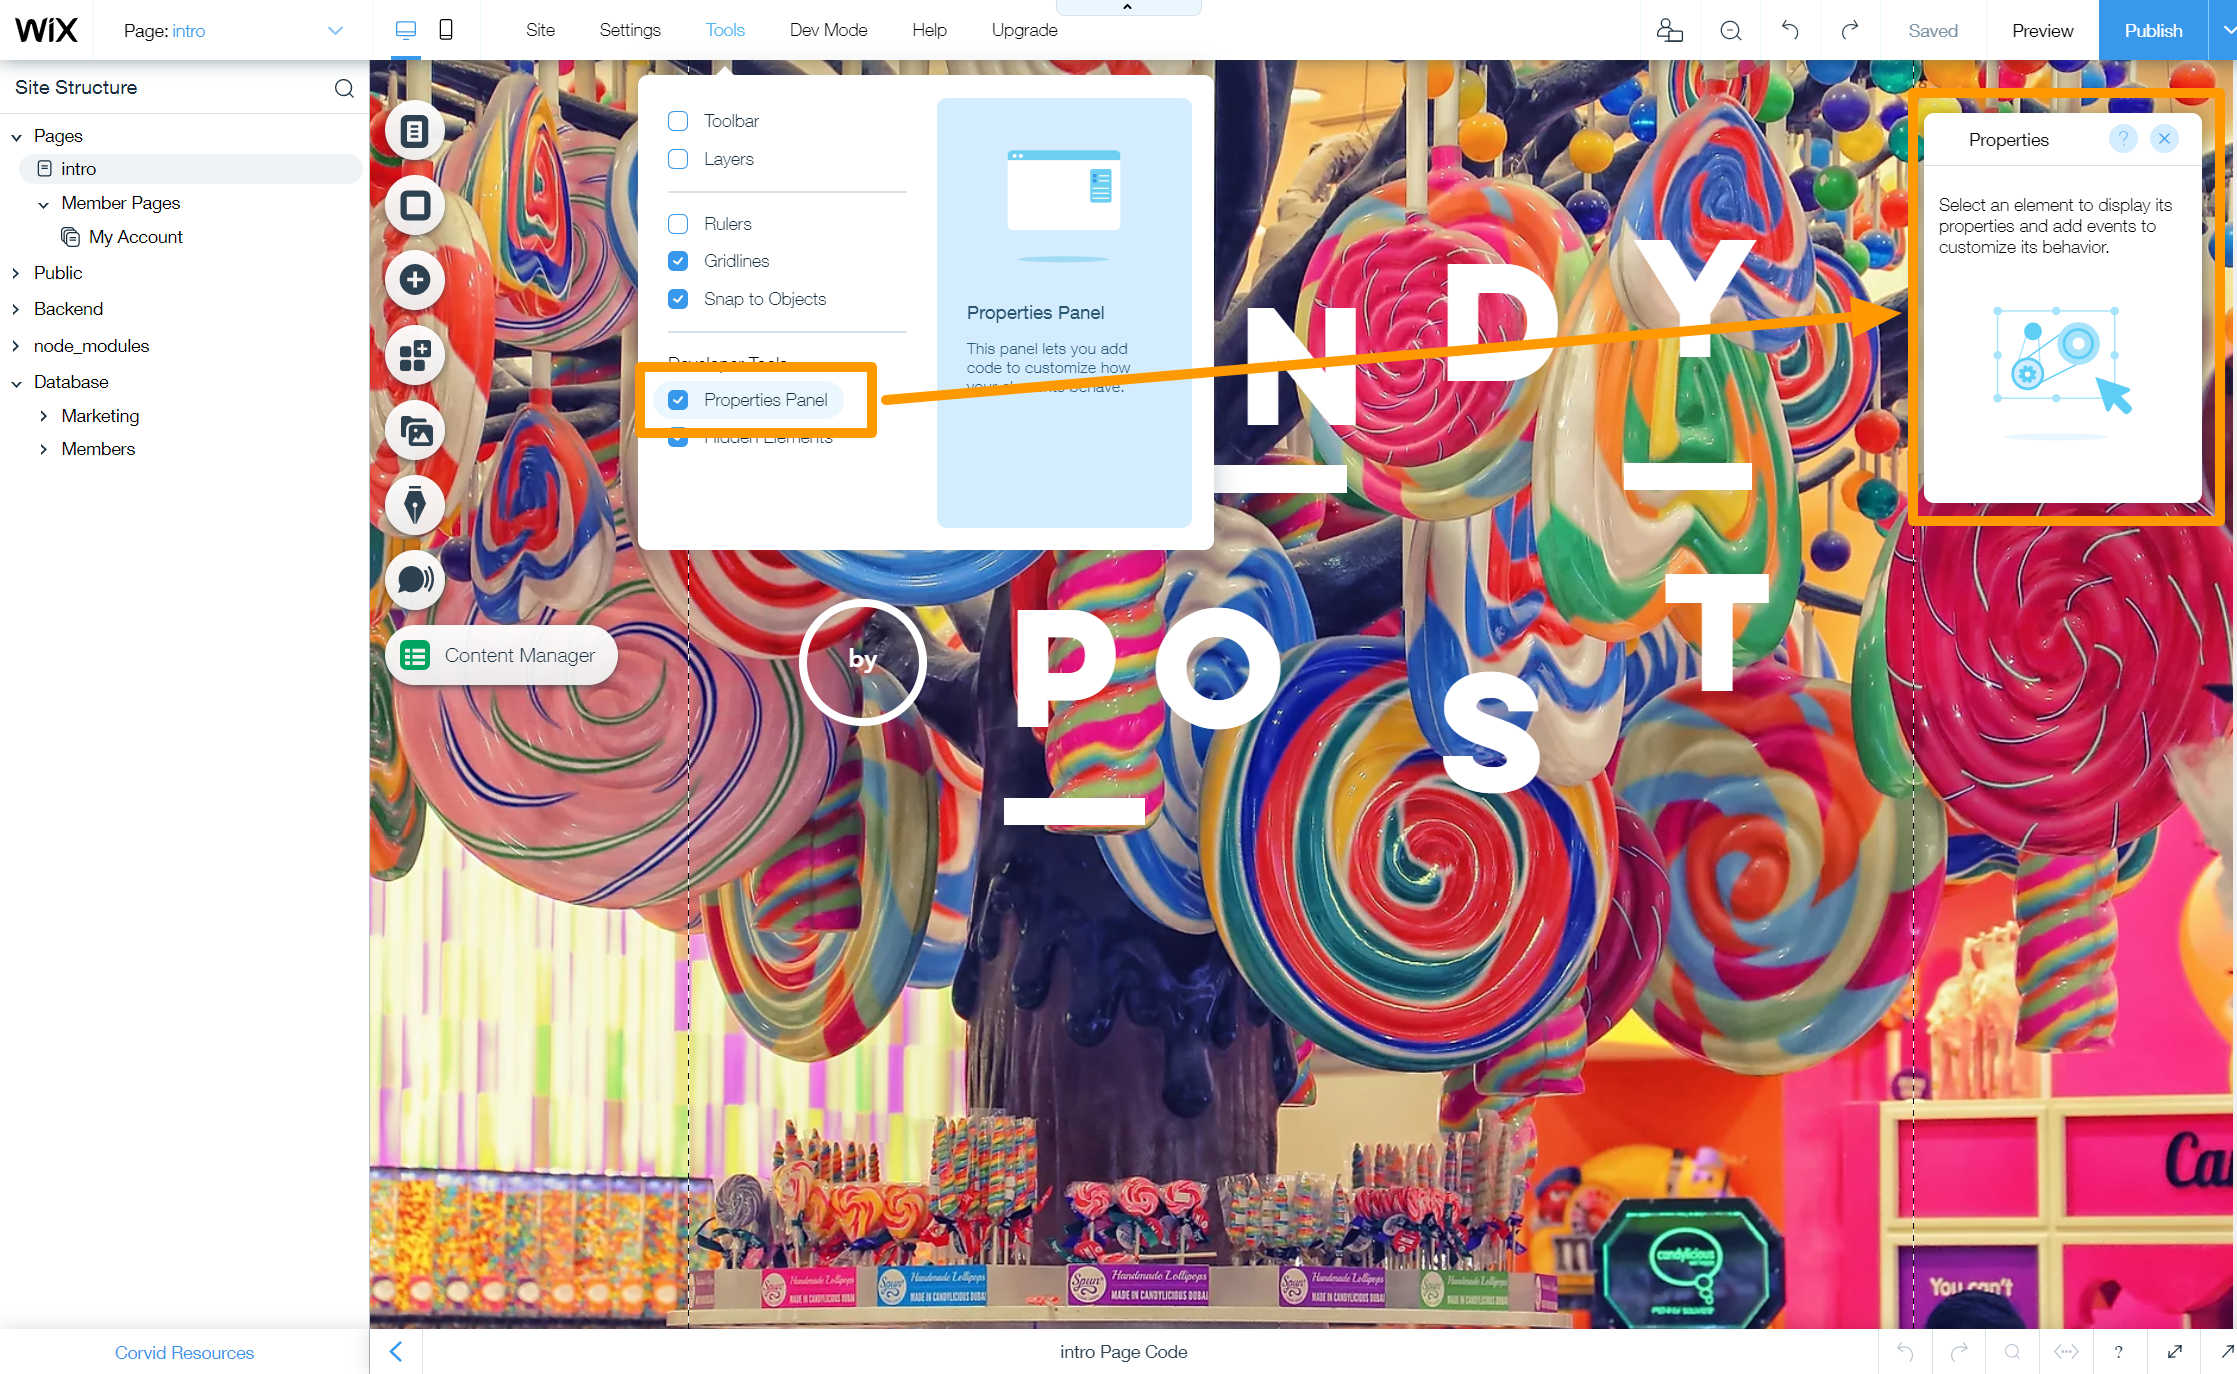
Likewise, you will need the 'Properties Panel' function turned on as well. This function allows you to add code to your website in order to customize how certain elements behave.
To do this, click on the 'Tools' button in the bar at the top of the screen and then check the box labelled 'Properties Panel'.
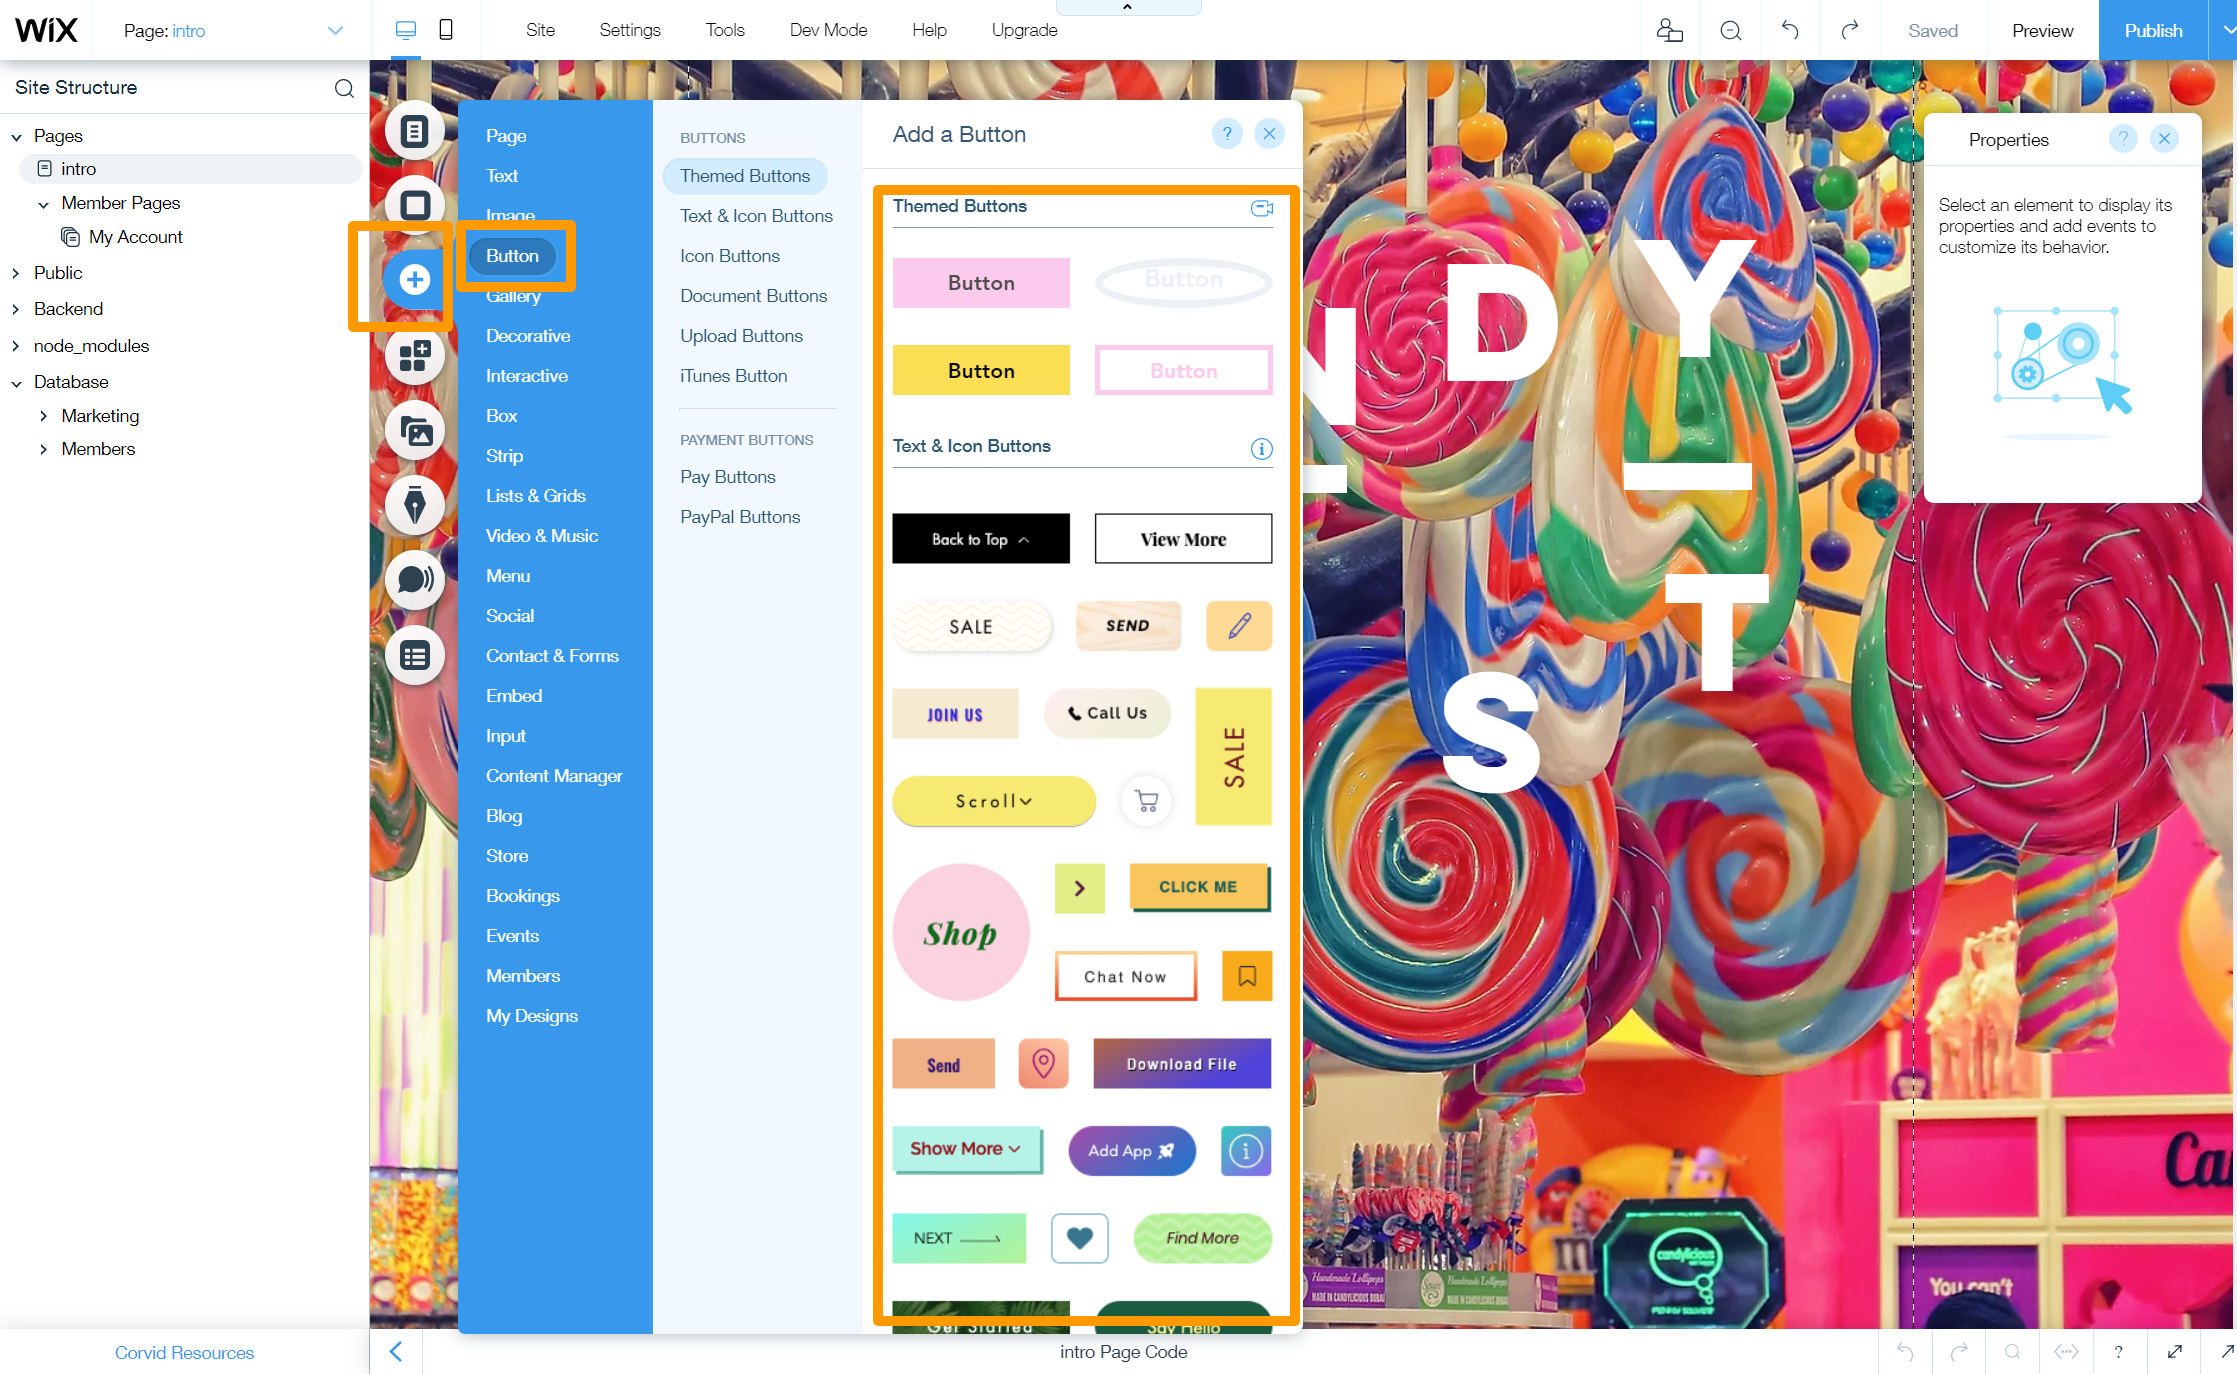
For the next step, you will need to add a button to your site. Simply press the '+' button in the panel on the left and select 'Button' from the list of options. This will enable you to add a button in whatever style you choose, as well as label it however you see fit.
At this point, you will need to refer to the Properties Panel to manage your button. Head to the second section of the panel, titled 'Events'. Then press the '+' button next to 'onClick'.
This will generate an onClick event for the button, which simply means that you can now use coding to dictate how the button should behave whenever somebody clicks on it. It will, however, also add some default code to your page automatically. But don't worry, we are going to delete this.
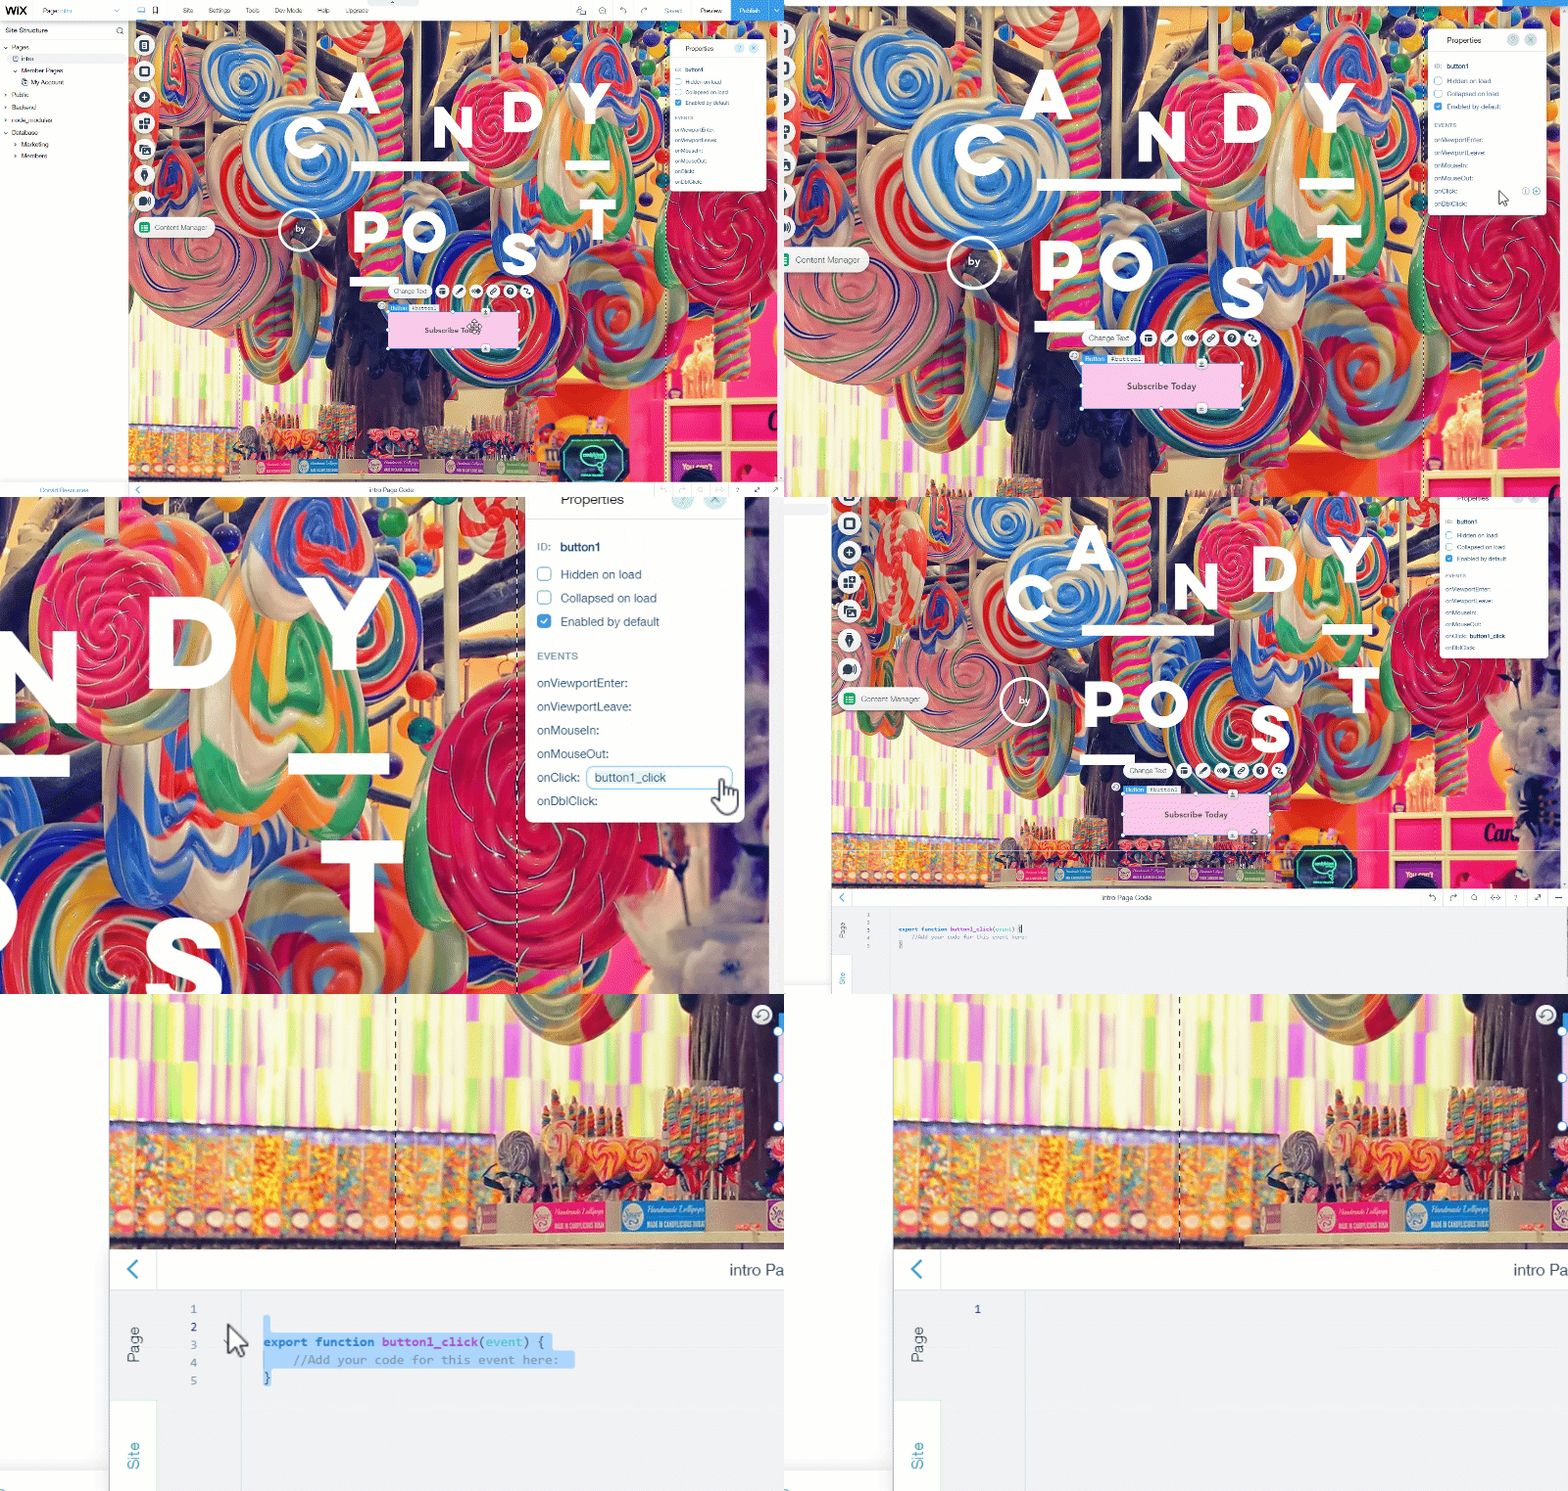
In our example, it’s button1_click, but if you have multiple buttons on the page, it might have a different number.
Linking your button to your Billsby Checkout URL
At this stage, you should have a button with an onClick event, labelled button1_click, or something similar with the number dependent on the number of buttons you have onscreen. As well as this, you should also have the Billsby Checkout URL you made earlier, that should look something like; https://checkout.billsby.com/subscription?data-billsby-company=candybypost.
Now, we’re going to use a little bit of code to bring them all together.
At the bottom of the page, there is a white section that has the name of your page, followed by 'Code'; click on it to expand. Then, on a new line, paste in the code below:
import wixWindow from 'wix-window'; export function buttonname (event, $w) { wixWindow.openModal("billsbycheckouturl", { "width": 700, "height": 530, }); }
All you need to do is replace the two placeholders in the code with the items we setup before. So, where it says buttonname, simply input the name of the onClick event for your button e.g. button1_click. Then, where it says billsbycheckouturl, input your established Billsby Checkout URL.
Here's an example of how the code should look when it's finished:
import wixWindow from 'wix-window'; export function button1_click (event, $w) { wixWindow.openModal("https://checkout.billsby.com/subscription?data-billsby-company=candybypost", { "width": 700, "height": 530, }); }
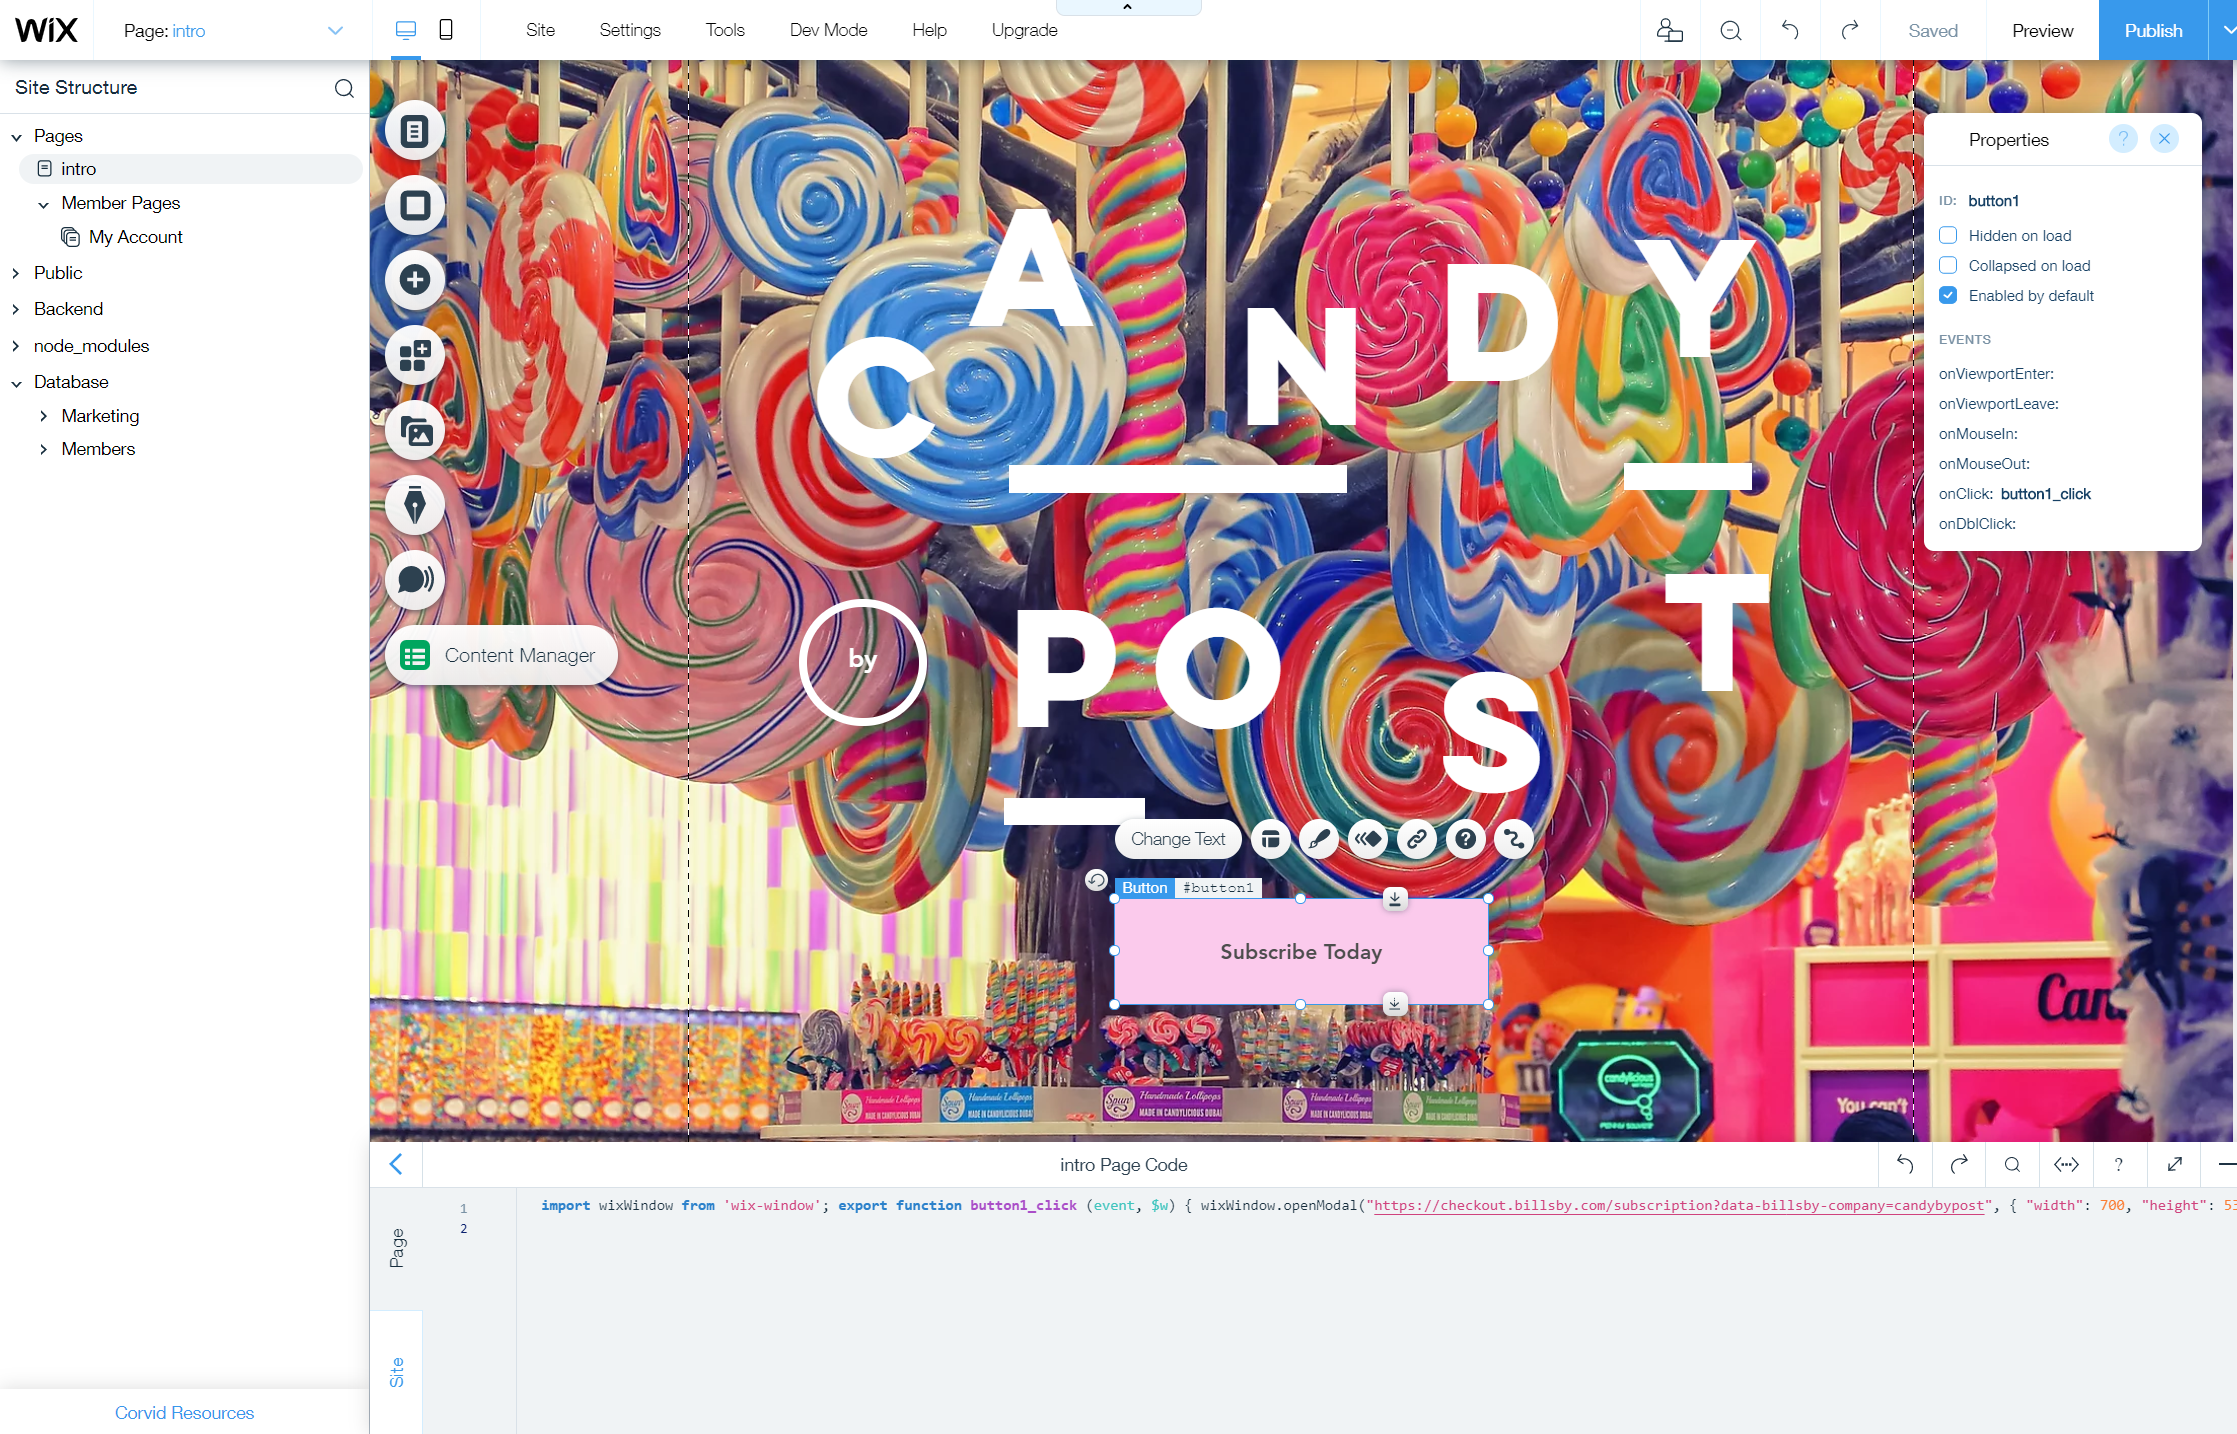
If you are adding more than one button to open the checkout modal on a singular Wix page, you will want to remove the beginning '' import wixWindow from 'wix-window'; '' part of the code for the second button.
Here's an example of how the code should look for two buttons on one page:
import wixWindow from 'wix-window'; export function button1_click (event, $w) { wixWindow.openModal("https://checkout.billsby.com/subscription?data-billsby-company=candybypost", { "width": 700, "height": 530, }); } - for button 1

export function button2_click (event, $w) { wixWindow.openModal("https://checkout.billsby.com/subscription?data-billsby-company=candybypost", { "width": 700, "height": 530, }); }
Make sure to press 'Save' after your work and 'Preview' to check your button works correctly. If you have followed all of the directions properly, then your button should be successfully up and running with Billsby Checkout.
If you want to set-up and create any other buttons across your site, you'll want to repeat these steps. Remember, each button will have a different name according to the number of buttons on your page. Happy coding!
Updated over 3 years ago
