Billsby Checkout
You can embed the Billsby checkout to allow your customers to sign up for new plans and create new subscriptions. The branding of the checkout flow is determined on the configuration page but the structure of the flow is determined by the embed codes you use.
You have the flexibility to introduce the Billsby checkout at any stage of your payment journey. All you need to do is pass over the relevant information that you've collected from the customer so far, and we'll take care of the rest.
Basic Checkout
To use this feature complete the following steps:
-
Log into your Billsby account and click on Settings > Embed codes > Checkout.
-
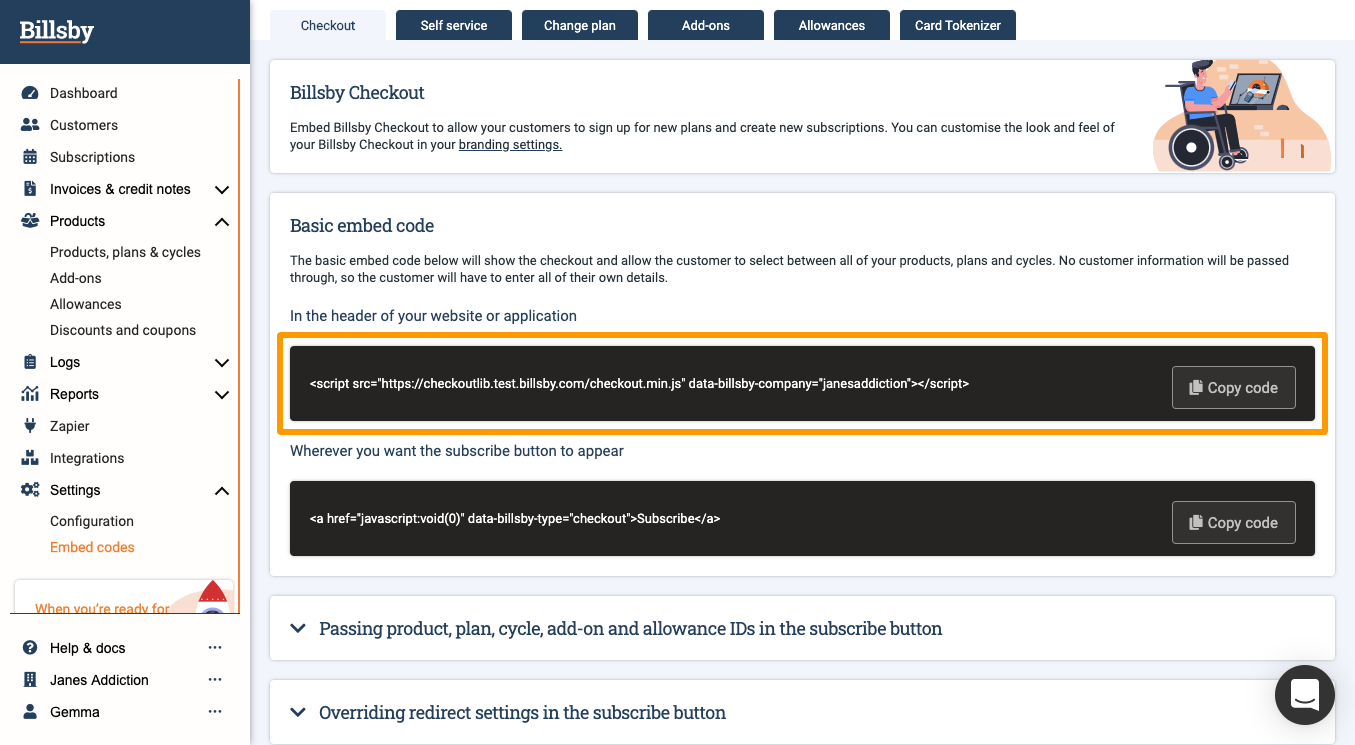
Here, you will find two snippets of code that need to be added to your website in order to successfully load the checkout modal. The first is the Header code, copy this snippet using the button provided.
-
Next, paste it into the header code of your website, before the closing tag.
-
After that, return to the embed codes page and copy the second snippet of code that handles the Subscribe button. To do this, you can use the button provided.
-
Finally, paste the code wherever you want the button to appear. Please note that the default text for this button is ‘Subscribe’, but this can easily be changed by changing the text that appears in the code snippet, in between the open and close tags.
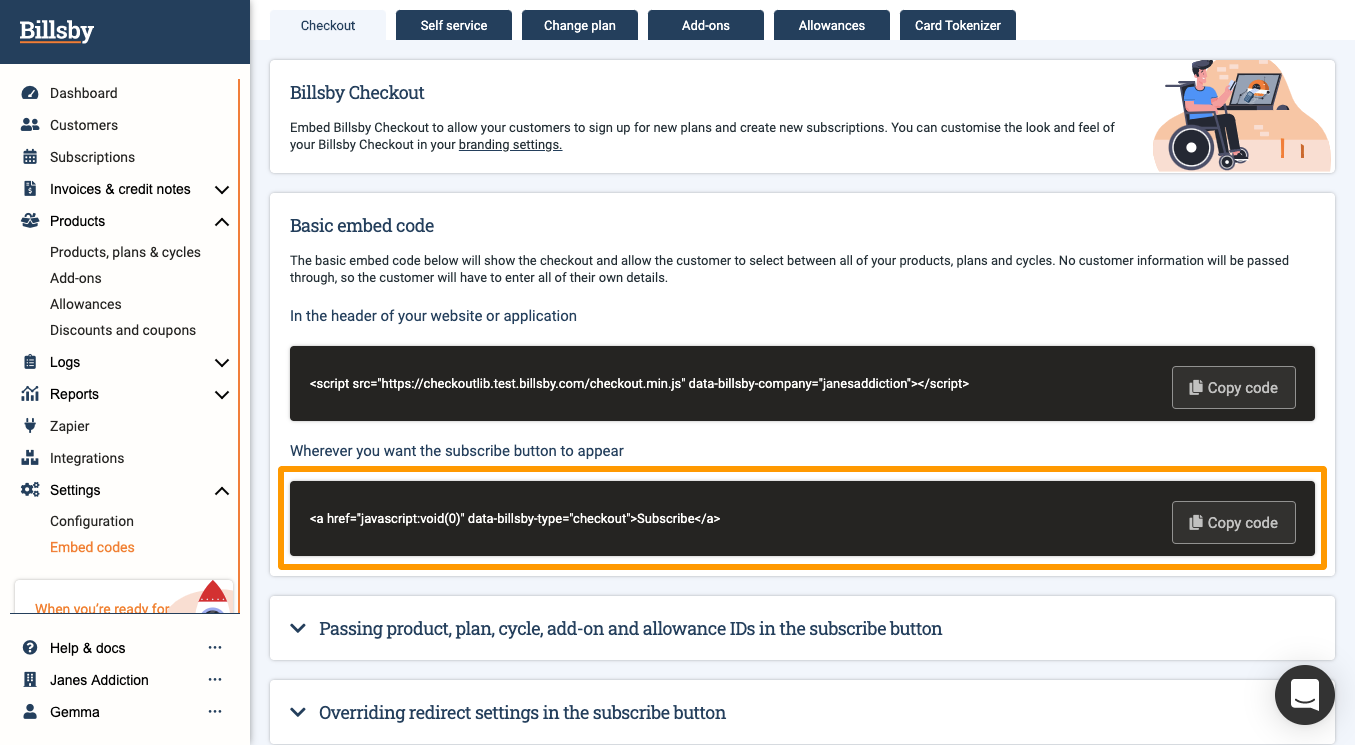
If you follow all of these steps correctly then when the subscribe button is pressed on your website, the Billsby checkout modal will appear, commencing the checkout flow.
The Checkout flow
Using the basic embed codes provided, the checkout experience will be comprised of five main steps. The process begins with the option to select which product, plan and cycle they would like to sign up for:
Choosing a product, plan and cycle
The first thing your customer will need to do is, of course, choose what they want to subscribe to. We'll need to know what product they wish to purchase, and which plan and cycle they would like to subscribe to.
Name, email and address
These are our mandatory fields; we need these in order to complete the customer's subscription. The address that we require is the billing address. You can choose, when creating your product, whether you need to collect an additional shipping address as this may be different.
If you have opted to use address validation, we'll show an address look-up tool and use this to validate the customers address. If not, your customer will need to enter their address manually.
Custom fields
The custom fields are the additional fields that you chose during the creation of the product. These are any additional questions you have about the customer and their choices that you wanted to collect during the checkout flow.
Payment
We need the customer's payment information in order to complete the initial payment and subsequently continue to bill them for the rest of their subscription. Payment details at this stage are mandatory. Even if you're offering a free period, we will still need their details so that we can bill them once this period is over.
Summary and confirmation
Before they go ahead with registration, your customer will see a summary of their order. This includes any information that you have passed on to us using the embed code. At this point they'll need to agree to the Terms of Use and Privacy Policy before making their payment and finishing their subscription journey.
Once the order is complete, they'll receive confirmation that their subscription has been successfully processed.
Passing product, plan and cycle IDs in the subscribe button
The first stage of the checkout is always for customers to choose which product, plan and cycle they want to subscribe to. However, you have the ability to create a more tailored purchasing experience.
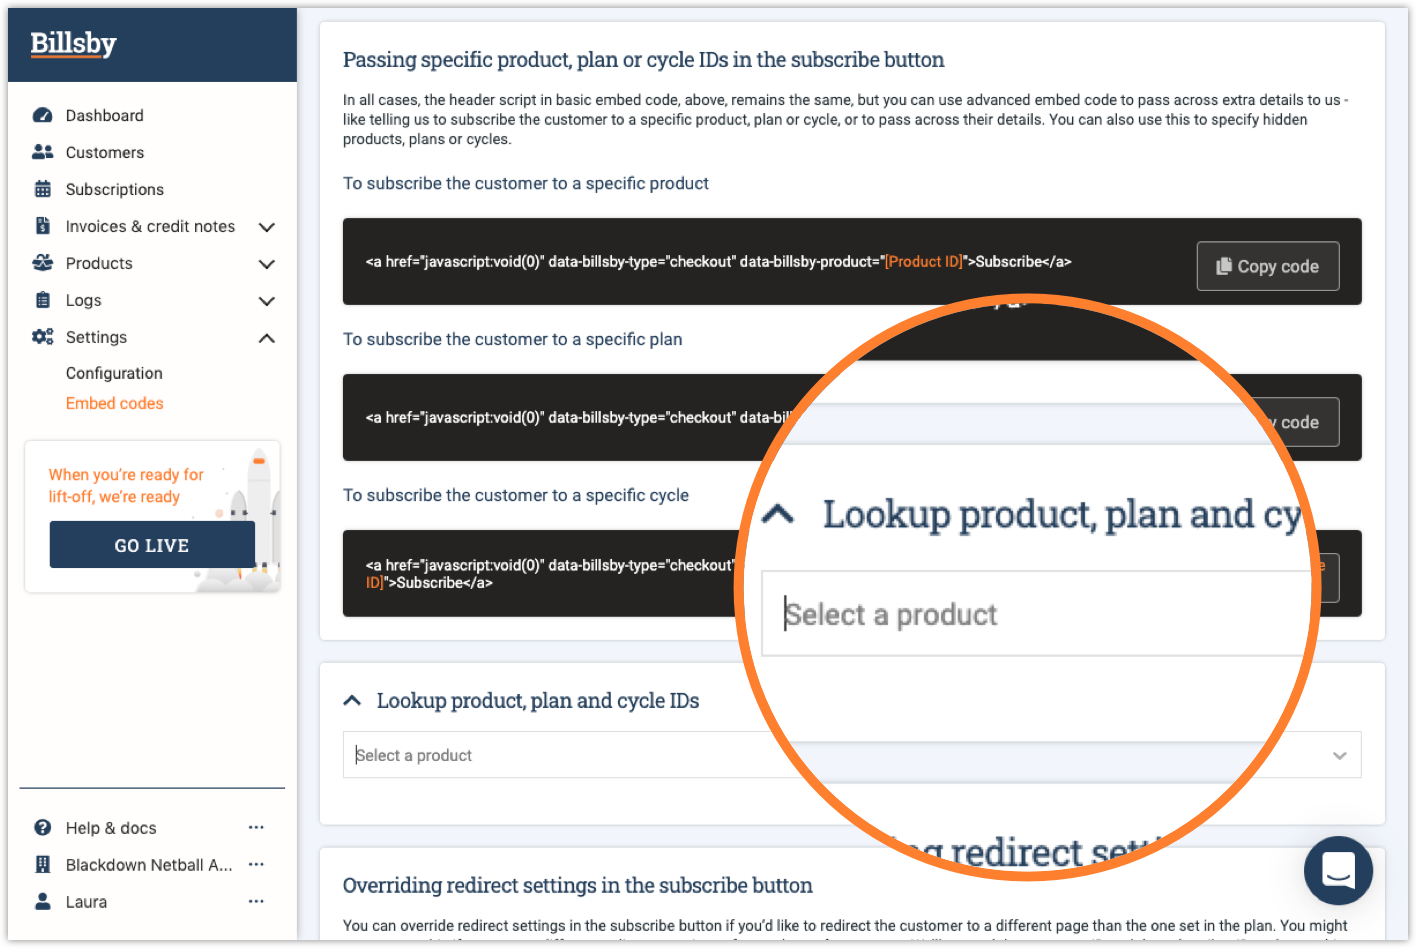
For example, when your customer is on the page for a specific product, you may want to provide them with a button that allows them to subscribe to that product, followed by the option to select a plan or cycle. You may even have descriptions of each of the available plans and cycles for this product with individual 'Subscribe' buttons for each. In which case, you would pass over the plan or cycle ID in the embed code, taking the customer straight to the name and email screen of the checkout.
If you're passing over a plan that is unit based, you'll also need to enter the amount of units you want to include in the plan.
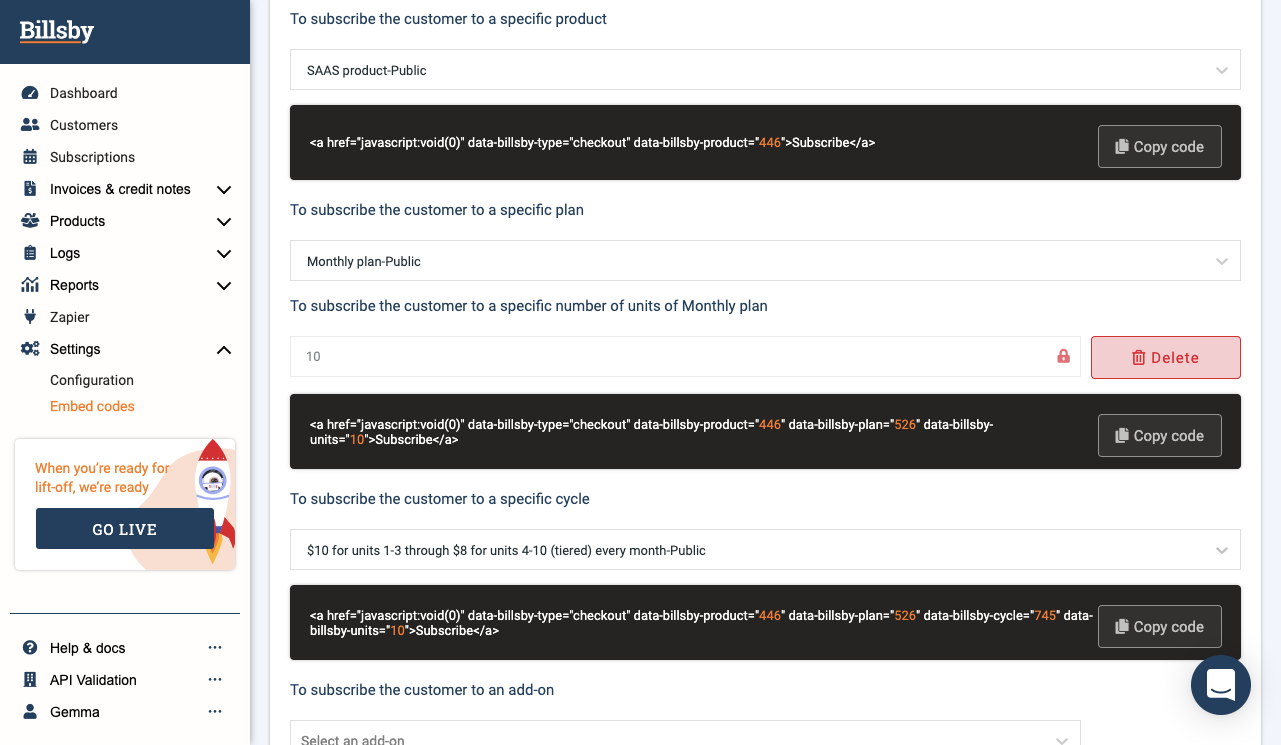
You can look up a product, plan or cycle in the drop down menu provided. When you select a product, the code for this product is automatically generated, so you can be sure you're using it correctly. This works in the same way for plans and cycles.
Passing over add-ons and allowances in the subscribe button
You also have the option to pass over information about add-ons and allowances in the checkout embed code, which means that you'll still be able to direct your customers straight to the payment screen on the checkout journey, even when you have a more complicated subscription that may include add-ons and allowances.
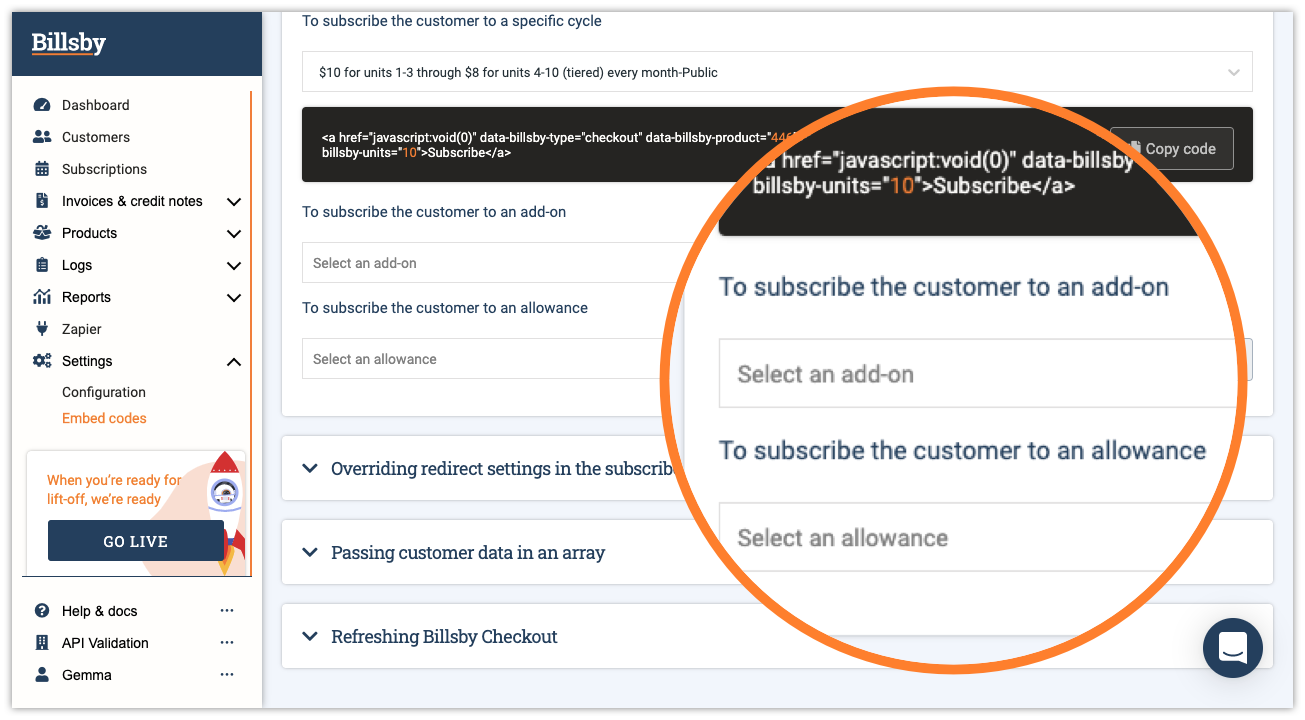
All you need to do is input the name of the add-on(s) you want to include as part of the subscription, alongside the number units if the add-on is unit based. Likewise, you can also pass over any allowances you want, though the units in this case will be calculated throughout the month and charged at the end of the first billing period.
Redirecting
Redirect URL
Once your customer has successfully subscribed, they'll be able to use the button on the confirmation screen to redirect to a new URL. To set up the 'Continue' button text as well as the redirect URL, head to Settings > Configuration.
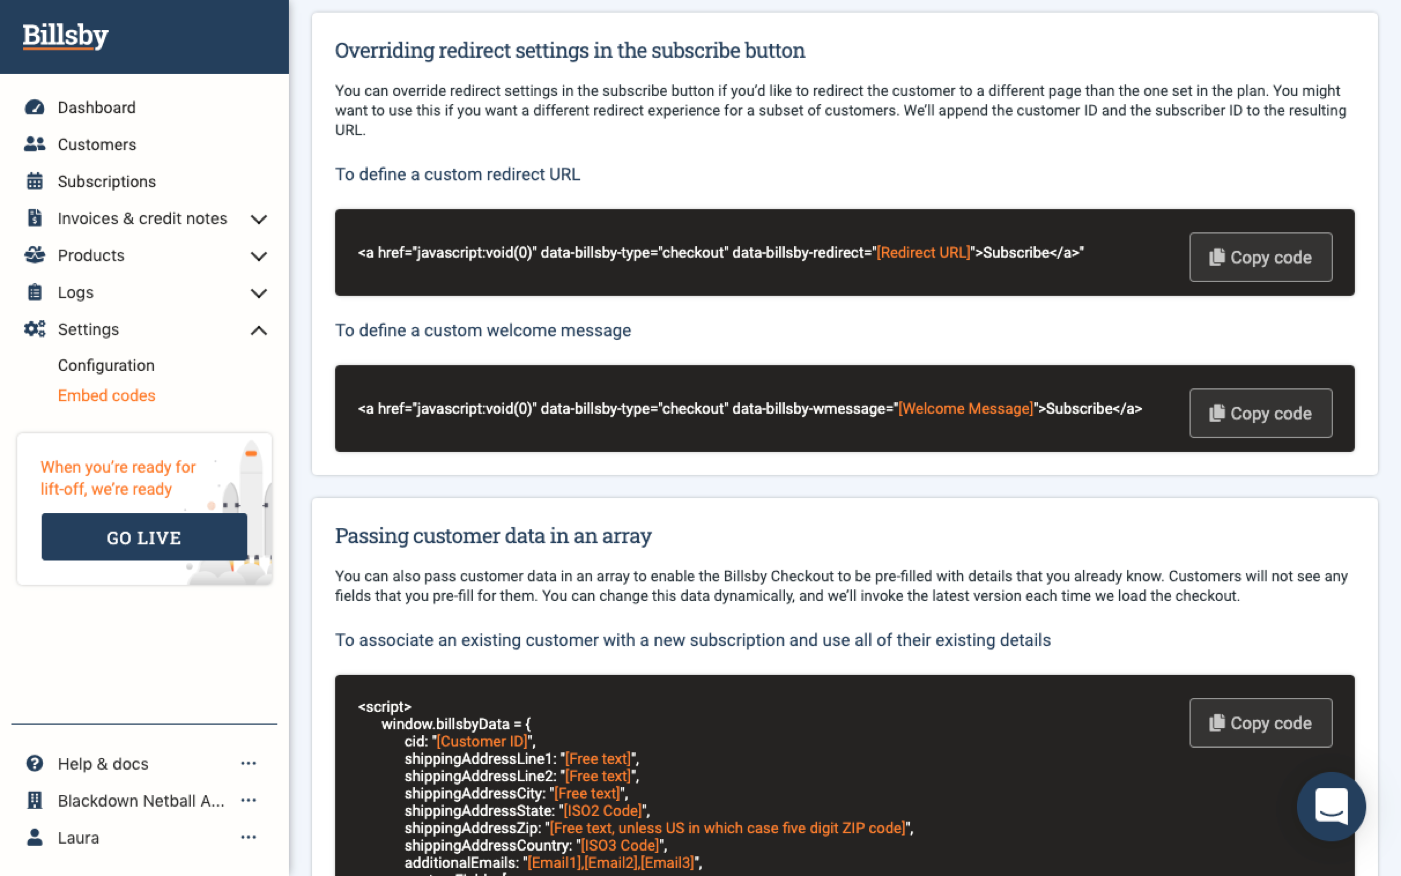
If you want to send customers to a different URL, you can use the embed code shown below to override the URL you set up in your configuration. We will then append the customer ID and subscription ID to the URL which you can then use to make API calls to look the customer up and take any further actions you wish to take, such as creating a user account.
Welcome message
Your welcome message will display at the end of the checkout flow on the successful subscription confirmation screen. To set this up, navigate to Settings > Configuration. If you want to display a different message to certain customers, you can use the custom welcome message embed code to override this setting.
Passing customer data in an array
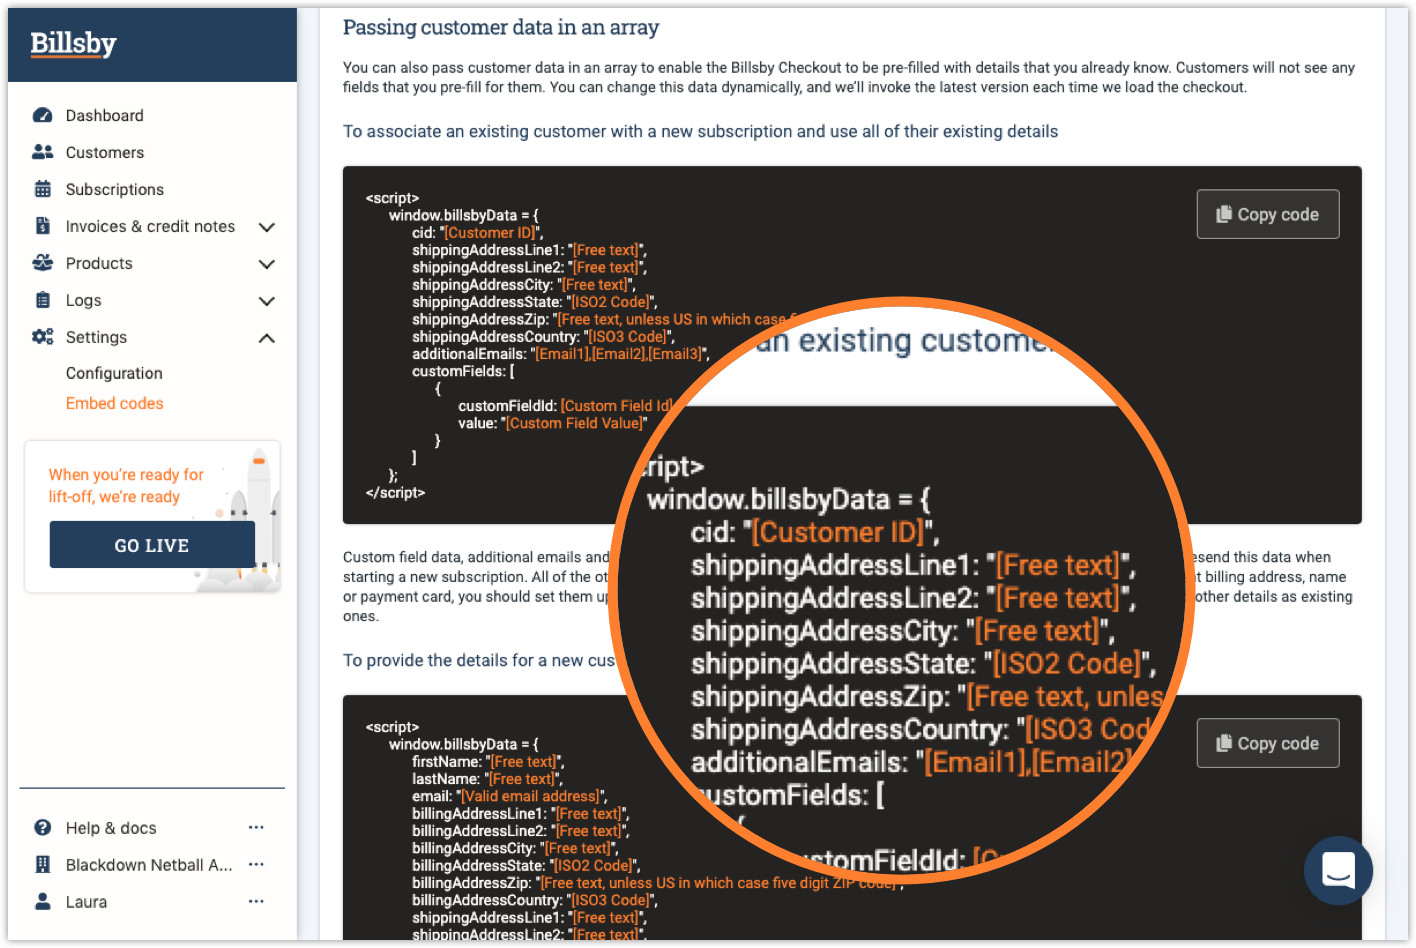
Once you've collected information about your customers, you can pass this on to us so that we may pre-fill their checkout information. This saves your customer time and avoids the tedious process of inputting details that they have already provided, whilst offering a more tailored and personal purchasing experience.
You also, for example, may have an existing customer who wants to start a new subscription. In which case, you can give us enough information to pass them directly onto the payment screen. For customers who have enough information about them already stored, they will not see the pre-filled information when every required section is full, allowing them to skip to any part of the checkout flow they want.
A new customer
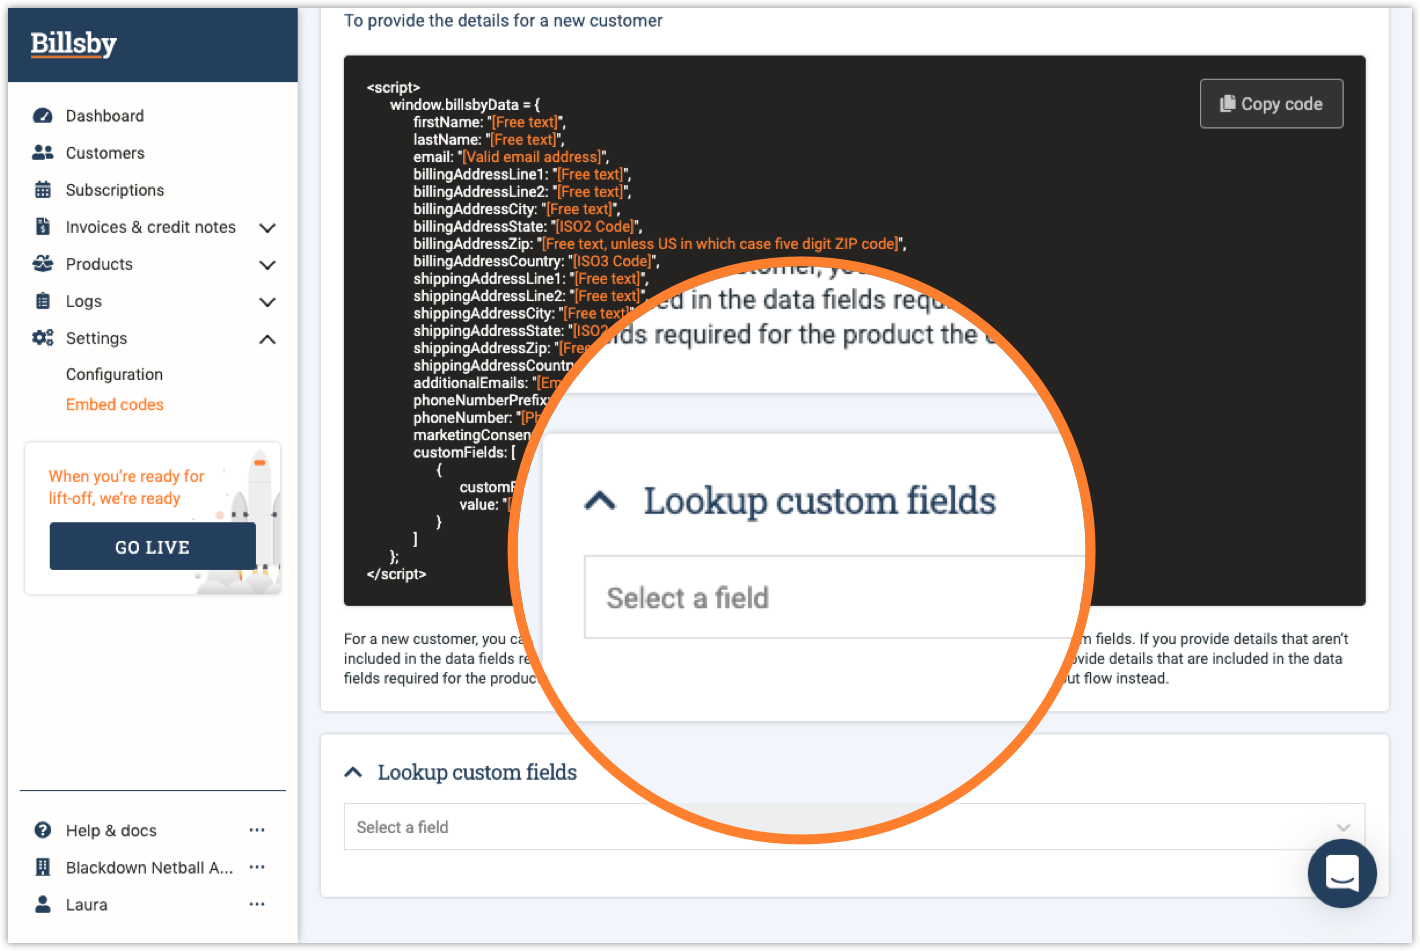
For a new customer, you can pass over as many details as you like. Any information that you do not provide that is required for the product the customer selects, shall be asked for during the checkout flow. So, if your customer has already given you their name, email and address and they've also agreed to opt in for marketing emails (one of your custom fields) you can pass all of this information over to us in array using the code provided and we'll send them straight to the payment screen.
If you want to pass over custom fields, you can search these using the dropdown at the bottom of the page. This is will automatically generate the code you need to do this.
Updated over 3 years ago
